

Every homeowner with a patch of green knows the struggle. You need to water the far corner of your yard, but your hose just won’t reach. That’s where the simple, yet crucial, technique of a “hose on hose” connection comes into play. It’s a fundamental skill for garden and lawn care that makes life much easier.
Understanding the Term “Hose on Hose”
While it sounds simple, the phrase “hose on hose” has a couple of interesting meanings. One is essential for your garden toolkit, and the other is a fun piece of trivia for plant lovers.
The Practical Application for Gardeners
In the world of home and garden maintenance, “hose on hose” simply means connecting one hose to another. This is often done to extend your watering range or to link a hose reel to a spigot with a short, flexible connector. It’s all about creating a custom watering system that fits your space.
An Unexpected Botanical Definition
Here’s a fun fact: the term “hose-in-hose” also describes a unique type of double flower. In these special blooms, one flower appears to be growing out of the center of another. You can spot this in certain varieties of azaleas and primroses. It’s a beautiful, though less common, use of the term.
The Leader Hose: Your Hose Reel’s Best Friend
For anyone with a hose reel, the leader hose is a game-changer. This short connector is a key player in an efficient and tidy watering setup.
What is a Leader Hose?
A leader hose, also called an inlet or jumper hose, is a short garden hose, usually three to ten feet long. Its main purpose is to connect your hose reel to the water spigot, creating a flexible link that takes the strain off your main hose.
Why a Leader Hose is Essential
By using a leader hose, you prevent your main hose from kinking and twisting where it connects to the reel. This allows you to place your hose reel in a more convenient spot, protecting your primary hose from damage and making it last longer.
Extending Your Reach by Connecting Hoses
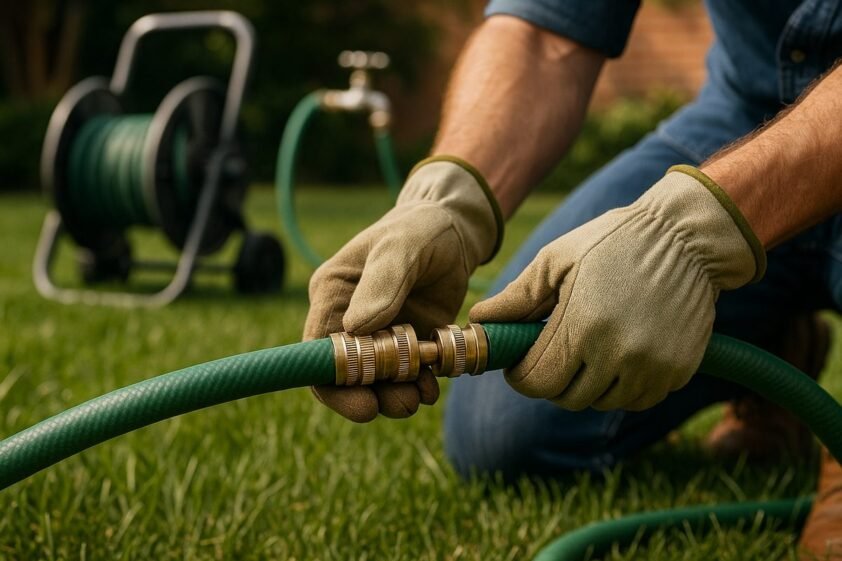
When you need more length, connecting two garden hoses is the go-to solution. The key to success lies in a secure, leak-free connection.
Choosing the Right Couplings and Connectors
Every hose has fittings on the ends called couplings. A standard hose has a male coupling (with threads on the outside) and a female coupling (with threads on the inside). These are usually made of brass, aluminum, or tough plastic. For even faster connections, many gardeners use quick-connect fittings that snap together effortlessly.
A Step-by-Step Guide to a Leak-Free Connection
To join two hoses, just screw the male end of one hose into the female end of the other. Check that the rubber washer inside the female coupling is in good shape, as this little ring is what creates the waterproof seal. Tighten the connection by hand until it’s snug, but don’t use a wrench. Over-tightening can damage the washer and cause leaks.
Troubleshooting Common Hose Connection Issues
Even the best setups can have issues. Luckily, most problems are easy to fix.
Solving Leaks at the Connection Point
A dripping connection is the most frequent problem. It’s almost always due to a missing or worn-out rubber washer in the female coupling. Simply replacing this small, inexpensive part will usually solve the problem instantly.
Dealing with Kinks and Clogs
Kinks are not only annoying, but they can also damage your hose over time by restricting water flow. A leader hose is a great way to prevent kinks at the spigot. To avoid clogs from sediment, flush your hoses occasionally and keep the couplings clean.
Best Practices for Hose and Coupling Maintenance
A little bit of care will keep your hoses and connectors in great shape for years.
Proper Care and Storage
After you’re done watering, release the water pressure before coiling your hose. Store it loosely, away from direct sunlight, as UV rays can break down the material over time.
Seasonal Checks and Maintenance
At the start and end of each season, give your hoses a quick inspection. Look for any cracks or wear, and replace old washers. Clean the threads on the couplings to ensure a good connection every time.